Although generating an Azure Function is very easy now, it's not completely obvious how to use Azure Table Storage with Azure Functions. Here's how to do it using Visual Studio 2022.
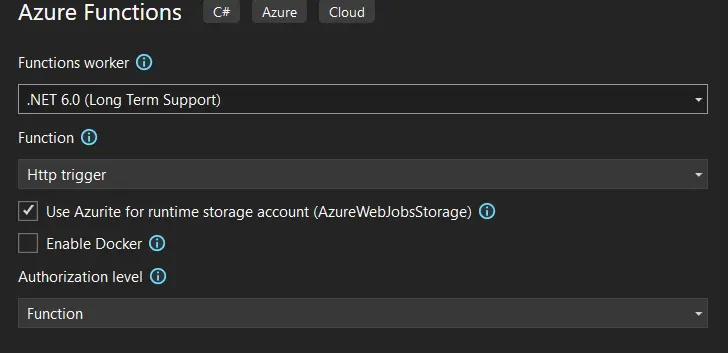
Create a project in Visual Studio
Do the following:
- Open Visual Studio
- Create a new project
- Choose the Azure Functions template
- Give it a name - I am calling mine FunctionAppWithTableStorage
- I am sticking with .Net 6.0 and I have left "Use Azurite for runtime storage..." checked.
You should see the following in the final window:
Click the "Create" button at the bottom of the screen.
Run the function out of the box
Run the function. You will probably have to click the button so that Windows Firewall allows access to this Azure Function. Eventually you see this screen:
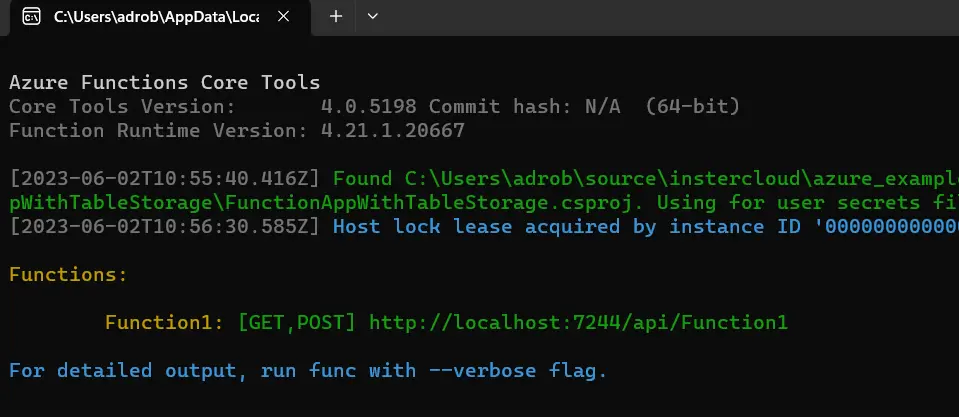
In the above image you can see the address of your function - "http://localhost:
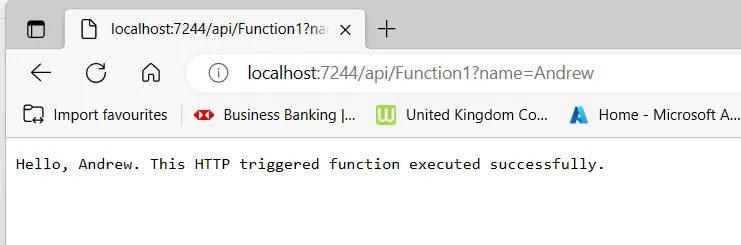
Test the function by entering something like the following string into a new browser session:
localhost:7244/api/Function1?name=Andrew
You should now see the below image in the browser and a success message in the Command Window.
Close the Command Window to stop running the function.
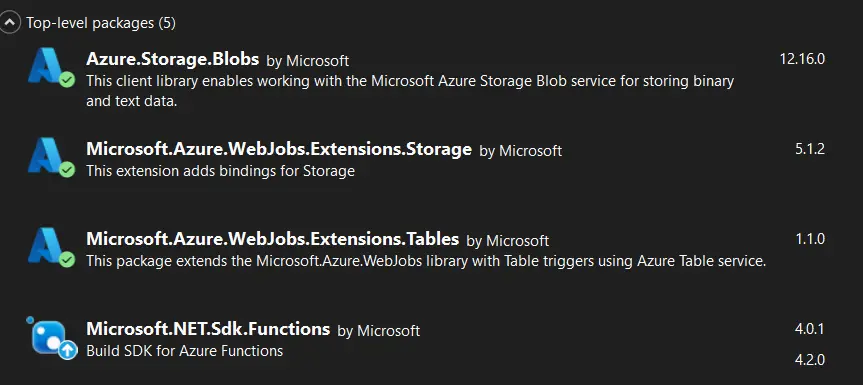
Add Nuget Packages for Table Storage
Add the following Nuget packages (you should already have Microsoft.Net.Sdk.Functions installed. Things change quickly so for now play it safe by installing the exact versions below (you can upgrade it later):
Creating a table to use
Let's setup a table so that we can enter records into it. Do the following:
- If you don't already have a test Storage Account in Azure, then create a new one
- Install Azure Storage Explorer if you haven't already
- Open Storage Explorer
- In Storage Explorer open the subscription where your Storage Account is
- Open Storage Accounts
- Open the Storage Account where you want to create the new Table (the one you created earlier if you needed to)
- Open Tables
- Right mouse click then "Create Table".
- Give the new table the name "People"
- Click the "+" icon
- Enter a new record in the form as per the below image and click the "Insert" button (use the "Add Property" button to add the "Name" field)

Configure the connection string to connect to Azure Table Storage
Go into the Azure Portal and find your Storage Account. Click the "Access Keys" tab.
Copy the Connection String (not the Key) for your Storage Account.
Back in Visual Studio we now need to amend the "local.settings.json" file to set the Connection String to our Storage Account. We need to set the value for the Connection String called "AzureWebJobsStorage". That Connection String is used by the Azure Function out of the box.
We don't need a different connection string name so just replace the existing value (UseDevelopmentStorage=true) with the connection string you copied from the Azure Portal. The file should now look something like this:
{
"IsEncrypted": false,
"Values": {
"AzureWebJobsStorage": "DefaultEndpointsProtocol=https;AccountName=storageAccountXXXX;AccountKey=XXXXXXXXXXXXXXXXXXXXXXX==;EndpointSuffix=core.windows.net",
"FUNCTIONS_WORKER_RUNTIME": "dotnet"
}
}
We now have a connection to Azure Storage.
Add code to the function to connect to Table Storage
To pass data to Azure Storage we need a class that matches the structure of our new table, and that class should be structured to work with Table Storage. To work with Table Storage we need to inherit from Azure.Data.Tables.ITableEntity. Add the following class to the project (the name of the class matches the table name):
public class People : Azure.Data.Tables.ITableEntity
{
public string Name { get; set; }
public string PartitionKey { get; set; }
public string RowKey { get; set; }
public DateTimeOffset? Timestamp { get; set; }
public ETag ETag { get; set; }
}
Add the following line into the signature (top) of the function in "Function1" to make Table Storage a binding for the function:
[Table("People")] TableClient tableClient,
The function signature should now look like this:
public static async Task
[HttpTrigger(AuthorizationLevel.Function, "get", "post", Route = null)] HttpRequest req,
[Table("People")] TableClient tableClient,
ILogger log)
Earlier we saw that out of the box the function collects a name as an input and then gives it back as a response. Let's change that so that it writes it to Table Storage as well. Add the following to the bottom of the function just before the last line of the function in Function1:
People person = new People() { Name = name, PartitionKey = "Company1", RowKey = name };
await tableClient.AddEntityAsync
You can see that this code uses the input we give in the browser to create a new instance of the People class that we created earlier. The next line inserts that name into the table we have a binding to.
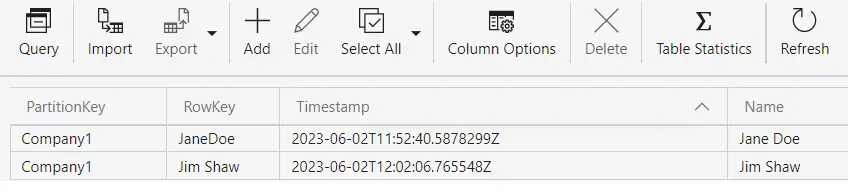
Run the function and enter a name or two. Note that we are using the name entered as a RowKey so you won't be able to enter the same name twice (RowKeys must be unique). Now go back to Storage Explorer and you should see something like this indicating that the insert statement is working.
That's it. We have connected an Azure Function to Azure Table Storage.