
using AI to build software and how to avoid the race to the average
Using AI to build software can result in a slippery slope towards developing average code.
Today, Angular is a very popular Javascript framework as it enables developers of all levels to create applications extremely quickly. However, once an application gets beyond a certain size, managing Application State can become very problematic.
Managing Application State means:
In fact, most if not all professional Angular developers would agree that managing Application State is what determines the success or failure of an Angular App. If state isn't managed well it can be a major development problem as components have to check in various places to make sure they are showing the correct data, and/or to work out what data to show. As a result, there are often errors and inconsistencies in the application.
RxJS within Angular is very powerful but arguably, of itself has limitations for managing Application State. Redux was originally seen as a solution as it had been successfully used for this purpose in React applications but implementing it in Angular is complex. NgRx was then developed along Redux lines but it's detractors say that it requires a lot of boilerplate code and can be complex to implement. As a result, the supposed cure from NgRx can be worse than the condition.
NGXS has been developed as an alternative to NgRx. It utilises more of Typescript and feels more Angular-ish. As a consequence it can seem like a choice that would work in many Angular applications.
NGXS achieves:
The following article provides a quick demo on how to get NGXS implemented in an Angular 9 App.
This article is part of a series during which an Angular App has been developed that gets data from a DotNet Core Web API. The starting point for the Angular App can downloaded from here. The API for the data can be downloaded from here.
The data structures are fairly simple so if you don't want to use DotNet Core for the API but want to follow along, you can easily substitute something else.
If you have been following along your Angular and API projects should be working together happily and you can skip this section. If you have just downloaded the repos from Github you will need to do the following setup process.
To run from the API you will need to have installed DotNetCore 3.1.
If you are using Visual Studio run the API using F5. Navigate to the country endpoint and you will see something like the following:

Note the port number. You will need it in the next step to configure the Angular project to call the API correctly.
If you are running the API from the command line (open a command prompt at the project level and type "dotnet run"), the API will be running at https://localhost:5001/.
In the Angular project, edit the "environment.ts" to replace the existing apiUrl line which maps to the internal API. You should replace the existing line with the following, using your port number (either 5001 or whatever Visual Studio allocated - 44399 in the above image), so that it maps to the DotnetCore API:
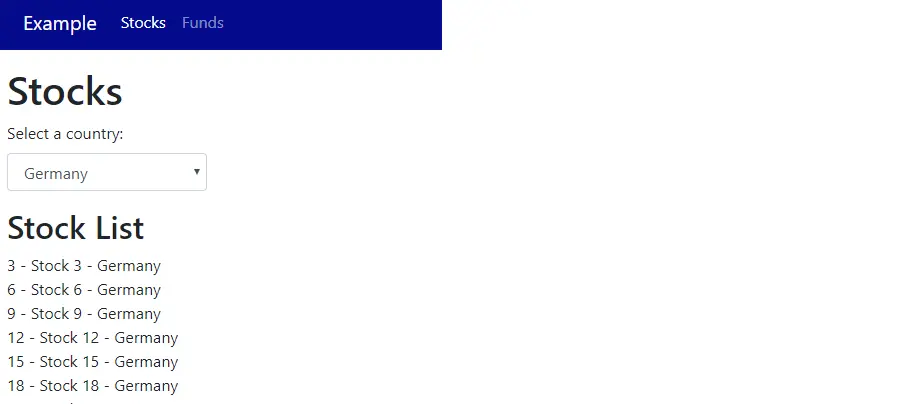
apiUrl:"https://localhost:44399/"Run the API then run the Angular App. Then select "Stocks" view and select a country. You should see the following:
In a command prompt type:
"npm install @ngxs/store --save"In "app.module.ts", import the NgxsModule in the following way:
import { NgModule } from '@angular/core';import { NgxsModule } from '@ngxs/store';
@NgModule({imports: [...NgxsModule.forRoot([])...]})
If you are reading this a long time after the date this article was last updated, you can double check the latest installation instructions by going to the NGXS installation page.
Under the "app" folder create a "store" folder where we can keep all things related to Application State. In the "store" folder create two folders, one folder called "state" and another folder called "actions".
In the "state" folder add a class called "financials.state.ts". This file will contain a data model for Application State and the state itself.
The state file ("financials.state.ts") will contain a data model of Application State and methods that manage all changes to state.
From an Application State perspective our App currently consists of three lists (country, stocks and funds), and a selected country. To represent this in a data model we will create an interface in the "financials.state" file.
Our first iteration of Application State will declare the data model, give each element of the data model a default value and provides a skeleton implementation of Application State using NGXS. Add the following code to the file:
import { Injectable } from '@angular/core';import { State } from '@ngxs/store';import { FinancialsService } from 'src/app/services/financials.service';import { Country, Stock, Fund } from 'src/app/data/model';
export interface FinancialsStateModel {countryList:Country[];selectedCountryId:number;stockList:Stock[];fundList:Fund[];}
@State({ name: 'financials',defaults: {countryList:[],selectedCountryId:undefined,stockList:[],fundList:[]}})
@Injectable()export class FinancialsState {constructor(private financialsService:FinancialsService){}}
Now that we have decided on a name for our state ("FinancialsState") we also need to make a small change to the "app.module.ts" file in order to use it within our application. We need to refer to that state by it's name. The line in the imports section of "module.ts" should therefore look like this:
NgxsModule.forRoot([FinancialsState], {developmentMode: !environment.production})
Actions are how we change state. We create an action class for every single thing which facilitates a change to Application State. Some examples of actions are the following:
Actions files are quite simple. All we do is define a unique type for the action using a string, and define a payload if there is one. When we create the type for the action we have to follow a naming convention and put the name of our state within square brackets. We will use the name "Financials" for our state. The important thing is to use the same name in each action.
To start with we will create an action to get a list of countries. In the "actions" folder create a file called "get-countrys.actions.ts".
In this case there is no payload (parameter) so the file should contain the following:
export class GetCountrys {static readonly type = '[Financials] GetCountrys';constructor(){}}
We've defined an Action called "GetCountrys". We now have to add code in "financials.state" to define what happens in Application State when that Action is "dispatched". The logic for "GetCountrys" is that we want to call the API to get a list of countries just once during each session of the App. To achieve this we add the following to the "financials.state.ts" file after the constructor of FinancialsState:
@Action(GetCountrys)getCountrys(ctx: StateContext){ const state = ctx.getState();let countrys:Country[] = [];if(state.countryList.length == 0){this.financialsService.getCountrys().subscribe(o => {countrys = o;ctx.setState({...state,countryList:countrys});});}}
Now we need to amend the "country-list" component so that it dispatches the "GetCountrys" action to the store (Application State). Currently it calls the "financials service" directly. Amend the constructor so that it becomes:
constructor(private store:Store) {this.store.dispatch(new GetCountrys());}
Selects are how we get the value of a variable from the store (Application State). We can then use that value in a component.
We have dispatched the "GetCountrys" action but we won't get any data back just from dispatching an action. In order to populate the "countrys" list in the component we need to define a Select to get the current value of the "countryList" array from Application State. When we use the Select syntax we create an observable of the type of the data structure that is in Application State. Add the following line above the constructor in the "country-list" component to define the Select:
@Select(state => state.financials.countryList) countryList$: Observable; Now we subscribe to changes in the observable to populate our data for the component. In other words within the observable returned is the data we want. Change the "ngOnInit" method of the "country-list" component to the following:
ngOnInit(): void {this.countryList$.subscribe(x =>{this.countrys = x;});}
For now, comment out the line in the onChange method of the "country-list" component.
Now we have data in our country list. We have commented out the line which changes the selected Country so we won't see any stock or fund data for now.
The country that is selected in the "country-list" component is part of our Application State. We need to store the "countryId" of the selected country as "selectedCountryId". To achieve this we first create the action to store the selected country. In the "actions" folder create a file called "select-country.actions.ts". Note that this time the action will have metadata, or a payload which will be the (selected) CountryId. Add the following to the new file:
export class SelectCountry {static readonly type = '[Financials] SelectCountry';constructor(public CountryId:number){}}
Implement the method in the store to run when this new action is dispatched by adding the following code to "financials.state":
@Action(SelectCountry)selectCountry(ctx: StateContext, action: SelectCountry){ const state = ctx.getState();ctx.setState({...state,selectedCountryId: action.CountryId});}
Now having defined the "SelectCountry" action we need to dispatch the new action in the "country-list" component. Do this by replacing the line we commented out in the "ngOnInit" method of the component with the following:
this.store.dispatch(new SelectCountry(this.SelectedCountryId));Now we can use the value of the selected countryId in our FundList and StockList components.
In the "actions" folder create a file called "get-stocks.actions.ts" and populate it with the following:
export class GetStocks {static readonly type = '[Financials] GetStocks';constructor(public CountryId:number){}}
Now we implement the code to run in "financials.state.ts" when the action is dispatched. This time we will get the whole list for that country each time a component calls for it. Also note that there is a slight difference in the code since we also pass the action into the constructor for the new methods. Use the following code:
@Action(GetStocks)getStocks(ctx: StateContext, action: GetStocks){ const state = ctx.getState();let stocks:Stock[] = [];this.financialsService.getStocks(action.CountryId).subscribe(o => {stocks = o;ctx.setState({...state,stockList:stocks});});}
In this component we need do three things:
Add the Select for "selectedCountryId" above the constructor using the following code:
@Select(state => state.financials.selectedCountryId) selectedCountryId$: Observable; Amend the constructor to use the selectedCountryId by changing the body of the constructor to the following:
this.selectedCountryId$.subscribe(x =>{this.getData(x);});
The App still works but we are getting our data directly from the financials service rather than using Application State. We now need to dispatch the "GetStocks" Action in the store from the "getData" method of our component. Do this by changing the top line of the constructor to the following:
constructor(private store:Store) {and changing the body of the "getData" method to the following:
this.store.dispatch(new GetStocks(countryId));Now we are dispatching an action to the store to get our stock data but we now need to hook into the stock data collection in the store and populate the list in the component when it changes.
Add a Select for the StockList :
@Select(state => state.financials.stockList) stockList$: Observable; Now in ngOnInit add the following to react to changes in the data:
this.stockList$.subscribe(x =>{this.stocks = x;});
Repeat the process you just used to create the "GetStocks" Action and implement it in the "stock-list" component, to implement a "GetFunds" action and implement it in the "funds-list" component.
The "financialsService" has some functionality we have now implemented using NGXS and so we need to remove it. Remove the following lines of code from "financialsService":
selectedCountry = new Subject();
selectCountry(countryId:number){this.selectedCountry.next(countryId);}
When you run the App it will look the same as it when you started this article. However, in addition to having just implemented a huge win for future scalability by using NGXS we have also delivered a small improvement in functionality. Now when we select a country in the "Stocks" view, the selection is also kept when we move to "Funds" view and vice versa.
We have used NGXS to implement State Management in our Angular 9 App. We don't have a lot of functionality in our App and so State Management is relatively simple. However, the important thing is that as our App grows more complex we have a solid framework to ensure that State Management is robust. This will go a long way to ensuring we always have a robust, consistent and test-able App.
You can download the finished git repository for the Angular App here.
Using AI to build software can result in a slippery slope towards developing average code.

Using DotNet 8 and Aspire With Azure Container Apps Makes Kubernetes Enabled Apps Incredibly Easy

Moving to a micro-services architecture can sometimes seem daunting due to the amount of technical choices to be made and the amount of planning involved. Often however, the migration can be made in manage-able steps. Here is one classic example.

Fast Endpoints have become very popular with .Net developers recently, but how much faster are they than regular Controller endpoints using .Net 8

GPT4 and other tools have good text summarisation capabilities but only Deep Mind is providing the real breakthroughs.

Managing Infrastructure State can be tricky in the cloud. AZTFY and Terraform can help with management